Friday, October 31, 2014

Bread

     It has been awhile (a LONG while) since I posted last. I am not sure how some of the mommy bloggers stay so consistent! Since my last post, I have done a LOT of experimenting in my baking. I have tried several new recipes and quite a few new products.Today's post will focus only on the different breads I have tried.

BREADS and MIXES
     Recently I discovered the beauty of the bread machine. For someone who is gluten intolerant or has Celiac's disease, I would recommend getting one. It makes baking bread so EASY! I mean, you dump the ingredients into the machine, push a button, and walk away. Okay so it may be slightly more complicated than that, but really! So simple!
     While I haven't ever baked gluten free bread from scratch, I have used 2 mixes in my machine. The mixes I have used are the Bob's Red Mill Gluten Free Bread Mix, and the Glutino Gluten Free Bread Mix. Surprisingly, they were both really good. If I had to say which was better, I would vote for the Glutino brand. Here's a run down of each bread. Also for those int
erested, is a rating for the Udis Gluten Free Bread.
     -Glutino
     First off, the Glutino bread had almost NO texture difference. My husband's work buddies have become my guinea pigs and that's their opinion. Since they eat gluten all the time, I like to think they are pretty good judges of things like that. According to my faithful taste testers, the Glutino tasted almost exactly like a good loaf of home made white bread. There was no discernible after taste, either. The box made a 2 pound loaf, which was tricky because my machine is only a 1.5 pound machine.
     All in all, this loaf of bread was amazing. I am not a huge bread eater, but when I made this loaf-man, it was gone in less than a week. Also, as long as this was kept in the fridge, it seemed to keep moist for quite awhile. Gluten free bread tends to dry out fast if it isn't kept in the freezer.
     -Bob's Red Mill
     The Bob's Red Mill bread was also fairly good. My biggest issues had to do with the texture and the slight after taste it left in my mouth. The texture of the bread seemed to be slightly rubbery. Still way better than store bought gluten free, but that texture was there for sure. It also had a slight after taste to it that the Glutino didn't have. This bread also seemed to dry out rather quickly in the fridge. That irritated me quite a bit. I'm sure if I had sliced it and then frozen it, it would have been fine.
     Even though the bag says that it makes a 1.5 pound loaf, this bread mix doesn't fit in my machine. It doesn't ever cause problems, but when I pull this loaf out, it is mushroomed up over the top of the pan. This made removing the loaf from the pan kind of hard. But that's my problem and has absolutely nothing to do with the quality of the mix.
     -Udis Gluten Free Whole Grain Bread
     For a pre-made gluten free bread, this is one of the best that I have found. It's dry. That's my biggest issue. I keep mine in the freezer and only pull out what I need. Then I toast it. Problem with dryness is now solved.
     One of my biggest gripes is the size of the pieces of bread. Blah. They are about half the size of a normal sandwich. 4 pieces of bread laid flat equals 12 inches. Yeah, super small. Despite the size and the dryness issue, this bread is surprisingly tasty. I make sandwiches with it all the time, and I frequently use it for french toast. If you don't bake fresh, Udis is one product that will probably satisfy you.

Bread Tips
     -If you didn't already know this, gluten free bread makes insanely good french toast. I have found that this is because the bread is slightly dryer than normal bread. Therefore, it soaks up just the right amount of liquid without getting all nasty and soggy. If your gluten free bread ever goes dry on you, don't throw it out! Use it to make breakfast.

     -Keep your gluten free bread in your freezer. It lasts longer. It isn't all that hard to pull apart two pieces and use them. Also, try not to thaw and then refreeze. This is going to dry your bread out faster.

     -If you want to cut costs, bake from scratch or from a mix. A box of mix costs me around $5. Throw in the eggs and oil you usually buy a lot of, and MOST of the time it'll be cheaper to bake bread that way. Even if all the ingredients add up to the $6.99 price tag of prebaked bread, You'll still save. Why? Because the loaves are WAY bigger when you bake from scratch. I'm talking double the size of a loaf of Udis bread. The picture below is HALF of a loaf. This loaf stands about 5 inches tall...yeah, totally worth it.

     Well that's all for now. I'll keep updating this post as I try new things. If I had to vote for my favorite of the above 3, I'd go Glutino. I have yet to try something made by Glutino that is gross.

HAPPY EATING!
~LP~


Tuesday, March 4, 2014

Pillsbury Gluten Free

A few months ago, I was wandering down the "cheese" isle at Smith's and out of the corner of my eye, saw the words GLUTEN FREE. Naturally, I stopped. Low and behold, those words adorned the front of a Pillsbury container! Seriously?!? I'll tell you right now, this was awesome news. I LOVE those pop-roll thingies. I have missed them. To see that a huge company such as Pillsbury is branching out to accommodate those with Celiacs or Gluten sensitivity was really exciting.

Naturally, I bought the chocolate chip cookie dough right away. I mean, come on. It had been a while since I'd had cookies. I hadn't gotten into baking so much yet and the cravings were instantaneous. Later, around Thanksgiving, I picked up the pie and pastry crust too. Below is my review of these two products.

Cookie Dough

I loved it. Raw and cooked, this dough was delicious. I had to work hard to control myself because the raw dough tasted so amazing I almost decided to eat it all before baking any! When the cookies came out, they were moist and delicious! My hubby and I ate about half over the course of the evening. My review: 5 STARS

Pie/Pastry Dough

I was diagnosed right before Thanksgiving. Ugh. Not cool. I mean, PIE! I wanted pie so bad, but couldn't eat it. I'd looked into making dough from scratch, but I have never been good at pie crust. So this year, when I saw dough in the cheese isle, I looked at my hubby and said "Please??" He agreed.

A few things about this dough-it is quite crumbly...even when raw. Follow the directions on the container to the best of your ability. My Mom did the handling of the dough--she has YEARS more experience than I do--and she still got frustrated.

Make sure you cover the edges of the crust with tinfoil-as per the instructions. This will prevent burning. All in all I loved it. It was great tasting-especially with peach pie filling. It does taste a little different than a regular pie crust, but with gluten free, that is to be expected.

You can find pictures and information about these products here. Hope you enjoy!

~LP~

Monday, January 27, 2014

A Gluten Free Tomato Soup---Finally!!

I absolutely LOVE tomato soup. A bowl of tomato soup with a cheese sandwich on a cold day...oh yum. Unfortunately, every can of tomato soup I have looked at in the store has wheat in it. Why? I have no idea...

So, while browsing through the Yahoo! Foods page the other day, I came across a really easy tomato soup recipe-with no gluten-and thought "I have got to try that!! And I did! Below you will find the link to the recipe.
The finished product-tomato soup, gluten free cheese sandwich,
lightly sauteed mushrooms, cauliflower, and salad.

Gluten Free Tomato Soup

My Take:

Ingredients:
-Basil
-Ground Cumin
-Salt
-Pepper
-28 oz can of diced tomatoes
-1 can chicken broth
-1 medium onion
-1/2 cup olive oil

Okay, I basically followed the recipe for everything. Here is what I learned:

-If 20 minutes isn't enough to get rid of the acidity, simmer it longer
-Add the herbs and spices to taste.
-Fresh is best! I used dried basil and canned tomatoes but if you can go fresh, do it!

Happy eating everyone!

~L


Fish Fillets

I have found that baking gluten free is much more complicated than just cooking. A lot of people who have just recently been diagnosed with Celiac's or a gluten intolerance may seem overwhelmed with the idea of cooking without gluten. Let's face it: our world today relies a lot on prepackaged dinners-many of which have gluten in them. I know this to be true because we relied on them a lot when I got diagnosed. We had a lot of food storage that we had to get rid of because it had some level of gluten in it. So, slowly I have learned how to cook from scratch.

Today's post is a recipe I tried over the last weekend. Actually, I took 2 recipes and combined them. This recipe didn't originally have gluten in it, but it is a tasty dinner idea. My hubby absolutely loved it. He went as far to say "I know you're an amazing cook, but this is absolutely exceptional!!" He certainly knows how to make me feel good.

Anyway, below are the links to the recipes I smashed together, followed by my own version of the tasty dish.
Baked Tilapia with Tomato and Basil
Baked Tilapia with Herb Butter

My recipe:
Baked Tilapia with Herb Butter and Mushrooms

Ingredients:
6 Tilapia Fillets
1 TBSP Basil
1 TSP Oregano
1 TSP Onion Powder
1/2 TSP Garlic Powder
4 TBSP Melted Butter
8 oz Mushrooms
1 TBSP lemon juice
Non-stick cooking spray

Directions:
Preheat oven to 400 F

Place a large piece of tinfoil on a cookie sheet. Spray with non stick cooking spray.

Place fillets on the tinfoil.

Melt butter in the microwave. Add spices and herbs and stir. Pour the mixture over the fillets.

Wash the mushrooms and pour over the fillets and herb mix. Fold the tinfoil over the fish and bake at 400 for 20 minutes. Sprinkle with lemon juice before serving.

Serve with an assortment of veggies.

MY TIPS:
-Fresh is always best! If you have fresh herbs, mince and use them. Fresh will go a lot further with flavor than dried.
-I used baby Bella mushrooms. I discovered recently that they have WAY better flavor than regular white mushrooms. (My hubby bought them by mistake when he went shopping. Now I am hooked)
-Know your oven. I always set my timer for about 10 minutes less than the required time and then check it. I do this because my oven cooks differently than others I have used.

My hubby has requested I cook this recipe again this week, so when I do, I'll post pictures. I may try this herb butter with shrimp as well.

Thanks for reading May your table be laden with tasty food!

~L

Thursday, January 16, 2014

Back in the Saddle

     After having spent the last year or so being pregnant and learning to be a Mom, it is time to put a little effort back into this blog. In one of my previous posts I mentioned having been diagnosed with Celiacs in November of 2012. Shortly after, I became pregnant and thus neglected my blog. I have changed the name from Kitchen Chronicles to Gluten Free-Tried and True, I hope to try out different gluten free recipes and give an honest opinion and review of them. I have found in the last year that there are A LOT of gluten free recipes out there, but a lot of them have...problems. Baking gluten free can be frustrating. Here are a few of the problems I have encountered:

-Dry and/or crumbly baked goods (gluten free flours tend to be a lot drier)
-Flavor and texture (Once again, gluten free flour can cause both of these)
-Misc. Mechanical errors (flat or heavy finished product)

     Before I move on, I have learned a few things that can help the above:
1. If ingredients are refrigerated, leave them out and get them to room temperature
2. If the recipe calls for eggs, you can do a few things:
     -Beat each egg separately BEFORE adding to the rest of the mixture
     -Add the eggs one at a time, mixing each in well before adding the next
     -And, as mentioned above, have them at room temperature

     Today I have chosen two recipes for gluten free baked goods that I have used over and over again. They taste VERY similar to the "glutenized" original versions. The first is a gluten free banana bread that is to DIE for. The best part for me is that all the ingredients are things I keep around my house regularly. The second recipe is for gluten free crepes. I love both of them and I hope you enjoy them too!!

Gluten Free Banana Bread
Source: http://www.celiac.com/articles/22010/1/Gluten-Free-Banana-Pecans-Muffin-Banana-Nut-Bread-Option/Page1.html
Click for the Original Recipe

1/2 cup (1 stick) unsalted butter at room temperature
OR
1/2 cup oil
2/3 cup granulated sugar
2 large eggs
1 1/2 cup All Purpose gluten free flour (I use Bob's Red Mill)
1 1/2 tsp baking soda
1 1/2 tsp baking powder
1/2 tsp salt
1/2 cup sour cream
1 tsp vanilla extract
1 cup mashed ripe bananas (about 3 medium sized)
1/2 cup chopped pecans or walnuts (optional)
Cinnamon Sugar (optional)

Directions:
1. Preheat oven to 375, for muffins, apply paper liner or spray oil to the muffins tin; for bread, use butter or oil spray to gease a 9 x 5 x 3 inch loaf pan; set aside.

2.  In an electric mixer, cream butter or oil, and sugar until light and fluffy. Add eggs one at a time and beat to blend.

3. In a medium bowl, whisk together all purpose gluten free flour, baking soda, baking powder and salt.

4. Add to the butter mixture and mix until the ingredients combined.

5. Add bananas, sour cream, and vanilla; mix to combine. Stir in nuts.

6a. For Muffin, fill each muffins tin abut 2/3 full and sprinkle some cinnamon sugar on top of the batter. Bake the muffin until golden brown on top. It should take about 20 - 24 minutes depending on the oven.

6b. For bread, pour the batter and fill the prepared loaf pan. Bake the bread for 1 hrs to 1 hr 10 mins until the bread is cooked. Note: the bread does get brown easily, so cover the top with foil after 20 mins of baking.

7. Let the muffins and bread rest for 10 minutes before transferring them to a rack to cool.

Okay, a few points for this recipe:
-The cinnamon sugar on top leaves a wonderful taste and a little bit of a crunch on the top. I would recommend using it.
-The sour cream does sound weird. Trust me when I say it helps with the moisture and the bread tastes the same as a recipe with gluten.
-REMEMBER it is butter OR oil. Do not do both.
-I use regular salted butter. I do not add more salt because of this

Next recipe

Gluten Free Crepes:

Ingredients:
1 1/4 cup milk (or favorite dairy substitute)
2 large eggs
2 TBSP melted butter OR light olive oil
1 cup all purpose gluten free flour
1/2 tsp salt
1 tsp sugar
1/2 tsp vanilla
1/8 tsp baking powder

Directions:
Pour milk, eggs, melted butter (or olive oil) and vanilla into a blender.

In a separate bowl, whisk together the dry ingredients, then add them to the blender. Blend just until combined and smooth. The batter should be the consistency of thin pancake batter. Add more milk, one teaspoon at a time if too thick.

To cook: 

Heat a low sided 8 inch skillet or crepe pan over medium high heat. Grease pan with oil or pan spray. GREASE PAN BEFORE EACH CREPE. 

Pour 1/4 cup of batter into the heated skillet. Swirl around the skillet until the bottom of the pan is covered with batter.

Cook the crepe for about 1 minute-the crepe should be barely moist on top.

Use a thin spatula to loosen the edges of the crepe, then gently flip. Cook for about one more minute, then remove from the pan.

A few points for this recipe:

-Make sure you only use 1/4 cup batter. Otherwise the crepe is way too thick.
-Use your favorite topping. I like using Nutella.

Thanks for reading!! I hope this helps some of the newly diagnosed out there!! Good eating to you all!!


Monday, February 25, 2013

The Good, The Bad, and the Ugly

For the Good:
After almost 2 years of trying, My husband and I are finally expecting a baby! I am about 4 and a half months along and we are WAY excited!! We are fairly certain that my issues with gluten was what was causing me to have issues.
For the Bad:
As much as I am excited about this baby, it has put a serious hold on all my creativity in the kitchen. You see, I have a major sensitivity to smells and can hardly cook anything in my kitchen. It has actually been really depressing.
For the Ugly:
I am in my last semester of school. Along with smell sensitivity, I have had about every other pregnancy symptom in the book. Yeah, morning sickness...bad. So, on top of being unable to cook, now I was having issues keeping food down. Hopefully this part of the pregnancy gets over quick.

So, to all those who may have passed by my very inactive blog, I apologize. I have still been experimenting, mostly with gluten free type foods. I will try to make a better effort to record, or even add great recipes I have found. Thanks for stopping by!
~LP

Monday, December 3, 2012

Chicken Stock and Homemade Soup

     About a week (maybe 2) ago, they announced in my block class that we would be having chicken noodle soup for class this Tuesday. Just barely the day before I was told that it was quite possible that I had a gluten intolerance. This presented me with an interesting puzzle. I was as yet uniformed as to the nature of a gluten free world, so I did a little research into gluten free soups. I came across a blog that absolutely made my day.
     The blog had a site that directed you in making your own chicken stock (cool, right?) Today, my experiment with this recipe was put into action. I must say my kitchen smells absolutely amazing! For those of you interested in this recipe, you can find it here:
http://thenourishinghome.com/2012/04/how-to-make-homemade-chicken-stock/

May your tables stay spread and your bellies stay full!

~L~

Thursday, November 29, 2012

A Lifestyle Change

     I went back to the doctor this week. My blood work is normal, but as I told him about the changed I have had since I altered my diet, he declared that I do, indeed have a gluten intolerance. I cannot begin to tell you how happy it makes me to finally know what is wrong with me. Finally, I have a solution to my physical problems.
     It has been easier than I thought it would be to cut gluten out of my diet...at least, it has been easy to do so at home. There have been a couple of incidences...The first was Saturday. My family and I went down to St George. We went to a restaurant that we knew would be friendly as far as food selection went. Well, the meal went fine. After the meal, the trouble started. Our waitress brought us fortune cookies...and without even thinking, I ate one.
     It has been an interesting experience. I suddenly have to think about what I eat. I have to look at packaging in the store. I have to bring my own treat to a lot of things...I have had people feel like they need to cater to my new needs. I simply tell them that I am fine and do not want to be an inconvenience.
     I think of all my experiences in the last 2 weeks, one in particular smarted the most. My sister was hosting a Pampered Chef party tonight. I received a voicemail telling me what was on the menu: sourdough pizza and brownies. I deleted the message and hung up. In telling my friends what the message was about, I burst into tears. I think this experience has brought my new diet changes into focus more than any other event.
    Okay ENOUGH of the doom and gloom. As a chef, the diet change has opened up a whole new line of creativity when it comes to food. I have experimented quite a bit over the last few days, but haven't had time to record anything. After all, finals are a week away for me!
     My most recent experiment involved chicken. Here is the recipe:

4 chicken thighs
2 cups chopped cabbage
1/2 cup chopped bell pepper
1/2 cup chopped onions
1/2 cup chopped tomatoes
2 TBSP Olive Oil
2 small limes
2 tsp basil
pepper salt
Appx 1 tsp Lemon pepper
Appx 1 tsp season salt

Pour the oil in a non stick frying pan. Sprinkle the basil, lemon pepper, season salt and three dashes of pepper onto the oil. Cut one of the lime's in half and squeeze both halves into the pan.

Cut the chicken into cubes and put into the pan. When the chicken is browned, add the peppers, onions and tomatoes. Cook until the chicken is done, and the veggies are soft. Season with salt and pepper if you wish.

My take on this experiment:
This meal was delicious! I absolutely LOVED it! The great part of this was that you can eat this mixture plain, or put it over rice. I will definitely be cooking this again in the near future.

Changes:
Above is my original recipe. When I make this again, I will probably saute the onions and peppers before adding the chicken. THEN when the chicken is browned, I will add the tomatoes and cucumbers.

Happy Eating!

PS
To any out there who are thinking of cutting gluten from your diet, I would strongly recommend reading The Paleo Solution, by Robb Wolf. It was pretty informative and has made my transition a lot easier.

Sunday, November 18, 2012

Gluten Intolerance??

     I have, for about a year, suffered from strange symptoms that my regular doctor could not explain. He tested me for diabetes (type 2) thyroid, and other things that weren't what was wrong with me. This last week I took a friend's advice and went in for a consultation with her doctor. We will call him Dr. Joe.
    Dr. Joe's nurse questioned me extensively on what I had been dealing with.
 Symptoms like:
--needing to eat every 2 hours
--sugar and breads making me dizzy and nauseous
--waking up bloated and sick EVERY morning, occasionally throwing up
--after eating sugar, having a raw throat
--being tired all the time
--etc
Dr. Joe came in and asked a few more questions. He then said "Sounds like you have a gluten intolerance." WHOA...over a year of misery and he has it figured out in ONE visit!!! YEAH! ...Well, we don't know for sure.
     The rest of the visit, he told me he wanted me to do some blood work. He also said that the test for ciliac's was usually no conclusive. The only way to really tell if this is my issue is to go off gluten for a month. Dr. Joe gave me the name of a book called The Paleo Solution. I have since read most of it and today, I started my gluten free diet.
    I feel amazing. ONE day without gluten and I have way more energy and my head aches are almost nonexistent. So, I guess this blog for the next week will be focused on recipes I create using gluten free foods.
Tonight's dish:

Bone-In Pork with Potatoes and Carrots

Ingredients:
1-2 small limes
1-2 tsp basil
1 tsp olive oil
2 tsp diced onions
Season salt
Lemon pepper
1 Pork steak, cut in half (pretty sure they were steaks)
2 potatoes
2 carrots
1/2 TBSP softened butter

Okay, to start with, I used my slow cooker for the potatoes and carrots. When we got home from church all we had to do is cook the meat. So we will move onto that.

In a non stick skillet, pour the olive oil. Mix it and move it so it covers the whole pan. Add the onions. They should be cut into pretty small pieces, about the size of what is in salsa. Add 1 tsp of basil to the pan, then squeeze half a lime into the bottom also. Saute the onions until they are almost clear.

In a bowl, squeeze the other half of the lime until you have a good amount of juice in the bottom. Add another tsp of basil to this. Place the pork into this and stir around so that the pieces are covered. Add a little bit of season salt and lemon pepper.

Once the onions are almost see through, put the pork into the pan. Cook thoroughly, checking the center for pinkness.

Squeeze another lime into another bowl. Add a sprinkle of basil. Let it sit to reconstitute. Add the 1/2 TBSP butter. Mix it so it is a kind of paste. This will go on your potatoes. (I have been asked to try and exclude dairy from my diet for the first month. Since I hardly ever eat or drink dairy, I felt okay with this bit of butter)

Enjoy!

I hope this recipe is enjoyable to you. I would try it, then see if you should add less of something. I for one will probably add less lime...probably the half that you soak the pork in! Thanks for reading!!


Friday, August 31, 2012

Chocolate Cake Creation

    Yesterday, I had a huge craving for chocolate cake without frosting. So, I grabbed a cake mix (because I wanted to make it fast) After I had poured the cake batter into the pan, I had a stroke of brilliance hit me! I got out a microwave bowl. In the bowl, I "melted" or microwaved 1/4 cup peanut butter til it was sort of runny. Then, I added 1/4 milk and stirred til it was smooth. I poured the mixture into the the cake pan and swirled it around.
    After I baked it, we tried it without frosting it. It tasted very similar to peanut butter bars, only light and fluffy. Yum!

Happy eating!
LP

Sunday, August 5, 2012

It's Been Awhile

     It has been awhile since I could post anything. I have been really sick the last little while, and sadly, it totally killed my creativity and desire to cook. My apologies.
     Yesterday was the first day in awhile that I actually did any cooking. I didn't even do it all myself either. Anyway, I discovered some time ago that broiling chicken is much tastier than cooking it on the stove in a frying pan. Last night, my husband expressed an interest in learning how I prepare the chicken to be broiled so he could do it for me.
     "It's really easy," I said. He replied with "I will watch and learn." I then was struck with inspiration, and proceeded to "teach" him to cook the chicken in the voice of the Swedish Chef from the Muppets. He found that pretty funny...
      Well, I am going to make more of an effort to actually post, now that I am feeling somewhat better.

Cheer!

~L~

Sunday, June 24, 2012

Two Things Tried

     Okay, so my fridge was kind of empty again today...So I had to invent!! I had some chicken in the fridge thawing out, and had this brilliant idea come to mind. So, here is what I did:
     I put about 2 TBS of olive oil in a non stick pan, then added finely chopped onion, dried basil, and a little lemon juice. Then I cut my chicken thighs into time pieces and put them in the pan to cook. I also sprinkled a little bit of lemon pepper on the chicken.
     In another pot, I made about 2 cups of chicken broth. I still had some gravy left from that other experiment (see previous post) so I added about a cup of that to it too. Then, I added some corn starch to thicken it into a sauce.
     Last, I boiled some spaghetti noodles. After they were cooked and drained, I put the chicken into the sauce and that went on top of the noodles-kind of like alfredo. It was really good...I just think the sauce should have been thicker. It also would have been yummy to add some veggies to the broth.
     The second thing I tried today was brownies. About a week ago, I made brownies from a recipe book I got in 8th grade-which can be a bad idea, as 8th graders can be prone to type stuff wrong. The brownies were really dry, so I made some fudge sauce too. Well, the brownies got eaten, but the sauce did not. So, the 2nd thing I tried today was a modification of that dry brownie recipe. Instead of using the cocoa called for in the recipe, I used the sauce. I also had to add milk, so the brownies weren't super dry. Also, I had about 1/4 cup of cream cheese in my fridge that I threw in. It turned out pretty good. Very interesting flavor.

     When I have gone shopping again, I will recreate the chicken and noodle recipe using actual measurements. It was a really good recipe. :)

Bon Appetite!

LP

Wednesday, June 20, 2012

Lesson Learned

     Finally! My computer if fixed! Now I get to explain yesterday's cooking catastrophe. I have only made 2 dishes that I have been told flat out never to cook again. The first was goulash, which my dad grew up eating and hated...thus the dislike and request never to cook it again. The second was sweet and sour meatballs...they just turned out nasty and I was quick to agree that I shouldn't make them again any time soon. I now have another thing to add to the list. Last night, I decided to make mashed potatoes in a whole new way. I was feeling lazy and decided to use my Idahoan Potato mix-flavor being roasted garlic. The twist I wanted to try was to use half of the water required and then substitute the other half with the left over gravy/broth mix from the last experiment (see previous post). It seemed like a good idea, but the flavor of the broth mix clashed really bad with the garlic. In short, it was disgusting and the smell was so strong  I thought I'd die! Lesson learned.
    I do want to make one point here. Eventually, I will try to make sweet and sour meatballs again. I will also eventually try to make a goulash recipe that my dad will like. Lastly, I will eventually try the potato concept again...without using garlic flavored potatoes.
     On another note, I am trying to make broiled chicken for the first time. We'll see how it turns out!

Cheers!

-LP

Saturday, June 16, 2012

Dinner Tonight :)

     Tonight for dinner I tried to recreate a dish that I came up with for Sunday dinner about a week ago. there were several things wrong with the dish then so I figured I would try again. Tonight when I cooked, I measured everything out, so here is the recipe for what I think I will call Chicken-Boiled Potatoes. Caution: You may want to read through this entire post before you try this recipe.

Chicken-Boiled Potatoes
                                                           
Chicken:
4 Chicken Thighs
4 C water
1TBS Candont Pesto Classic paste
1/3 C Lemon Juice
1 tsp basil
1/8 C butter

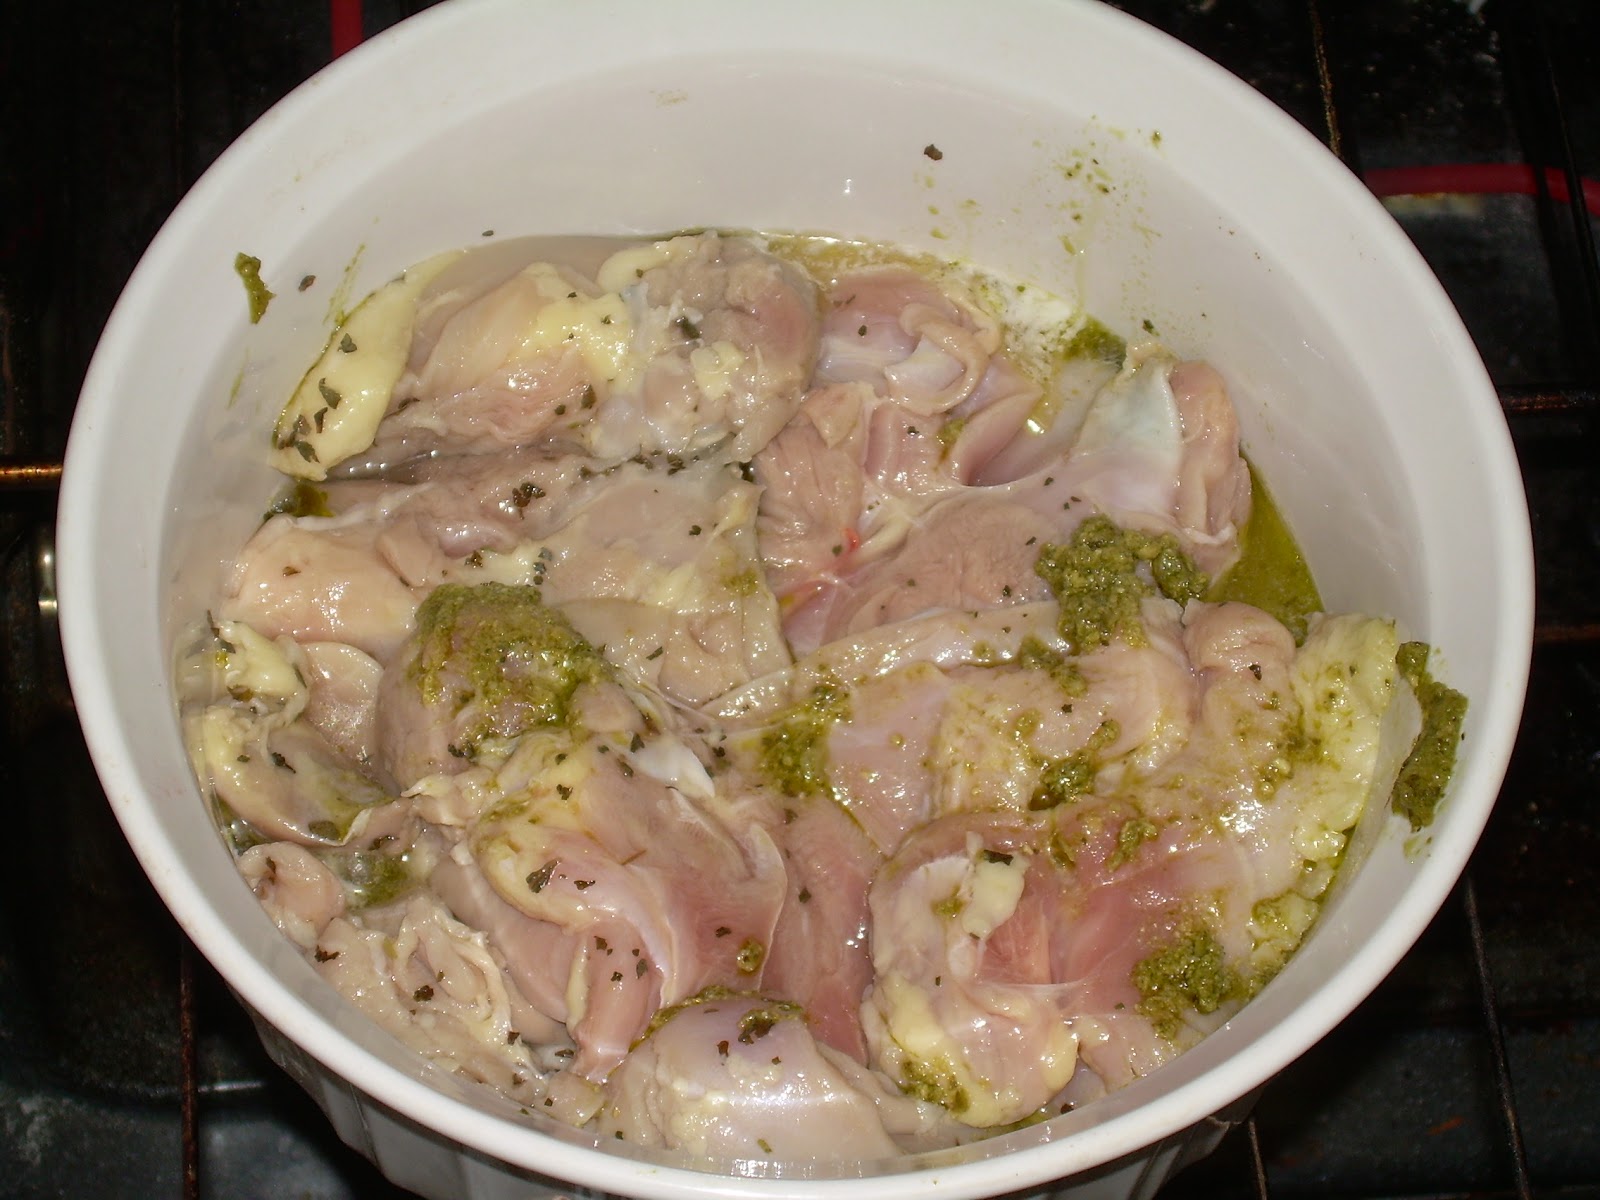
Before cooking
     Mix water, lemon juice, and basil in a large bowl (one that has a lid to go with it). Rinse off chicken thighs and place in the water mixture. Put the lid on and refrigerate. You can let it soak for an hour to 2 days. I let mine soak for two days because I had to go shopping.
     After the chicken has soaked as long as you want, you can do several things. Tonight, I pulled one of my pyrex dishes from the cupboard to cook the chicken in the oven. I cut the butter into 5 pieces and put pieces all around the pan. Then, I used the Pesto Paste, and put a little on the underside of each thigh, kind of like a rub. I put the chicken paste-side down in the pan, put the lid on it, and cooked it until it was done.
After cooking
   ALSO: I use my slow-cooker (crock pot) a lot. You can do this same process, and just leave it to cook on low. I have also cooked the chicken in a pan on the stove. Every method yields slightly different chicken. Slow cooker chicken is usually really tender, and not rubbery at all.


Preheat oven to 400 (Fahrenheit)

Potatoes:  (This isn't just potatoes, but I couldn't come up with a short enough name for it.)
7 medium potatoes
2 quarts water
3 TBS chicken base (I used the paste stuff)
1 TBS basil
3 C baby carrots
3/4 C onions, chopped
1/8 C butter

    Put the 2 quarts of water on the stove and bring it to a boil. While you wait, cut the potatoes into 1/4 inch slices and set aside, and chop the onions to your desired size (mine were in 1/4 inch pieces). After the water begins to boil, mix in the chicken paste until there are no clumps. Add 1 TBS basil to the mixture. Put the potatoes, carrots, and onion in the chicken broth and basil mixture. Cook until the potatoes and carrots are tender about half way through.
Butter in the dish
   In a baking dish (mine was Pyrex again) cut up the butter into pieces. Spread the pieces along the bottom of the pan. Put the vegetables from the pot and pour them over the butter. DO NOT DUMP OUT THE BROTH MIXTURE. Pour about 3/4 cup of the broth mixture over the top of the potatoes. This will help to keep them moist in the oven. Put the lid on the baking dish and cook until the potatoes and carrots are soft all the way through. I also sprinkled a little salt and pepper over the top of the veggies.
Before baking
     Last, if you so desire, you can turn the broth into gravy. All you gotta do is mix cornstarch with cold (emphasis on the cold) water. Mix it with the broth, bring it to a boil, boil for a few minutes and viola! Gravy!! You can find instructions for the cornstarch mixture on the back of the cornstarch box.
   
After baking
Okay, now, here are a few things I learned from doing this dish.

1. Potatoes cut in 1/4 inch slices cook a LOT faster than potatoes cut in chunks. When I tried this dish the first time, I used potato chunks. I would recommend doing the chunks, personally.

2. If you are going to cook the chicken in the oven, get it started and cooking BEFORE you start the veggies boiling-especially if you do potato slices and not chunks.

3. Sugar can help make something that was too spicy a little less so. Got to be careful though, or suddenly your gravy will be too sweet instead. (this happened to me)

4. I was in a hurry tonight and used baby carrots. Last time I tried this, I used long carrots that I pealed and cut into 3 inch pieces. It tasted much better that way.

Dinner on the table
How it looks on a plate. ;)
5. The chicken was soaking in the lemon water too long. I think, because the Pesto paste had a slight lemon taste, that it would have been a good idea to mix some of the paste with water and use that to soak the chicken in.

     We had a few friends over tonight to be my guinea pigs. A special thanks to Chris and Clairissa for lending their services. Here is the rating scale I am going to use:

Name of guinea pig (gp)
Rating for chicken with gp comments
Rating for potatoes and carrots with gp comments'

Chris: He was funny because he didn't really care much about details in the dish
Chicken: 4 (no comment)
Potatoes: 4.5-Potatoes were too mushy, but still tasted good
Carrots: 5-Loved them!

Clairissa: Clairissa was my toughest critic tonight. :)
Chicken: 3-The outside tasted good but because of the soaking in the lemon juice, the inside tasted off.
Potatoes: 4-Too mushy
Carrots: 4-Not much flavor in them (she said they weren't fresh and young enough, which is accurate. The younger the carrot, the better it tastes)

Bryan:
Chicken: 3-for the same reasons listed above
Potatoes: 4-Too mushy
Carrots: 5-Loved them!

     I calculated the average of the above scores. Turns out this meal now had an overall rating of a 4 out of 5. I can already see a lot of things that I can (and will) change about this dish. Hope you enjoyed it!

LP


Friday, June 15, 2012

Full Fridge Again (Finally)

     I went shopping today and refilled my fridge. We hadn't been to the store in several weeks, so we had a lot to buy. I went down the discount isle to see if I could find anything to cook with. I found some sage, and 2 different rubs that looked like they might be interesting.
     Anyway, I haven't been able to create in a few days since we had nothing to cook with. :) I'm excited now, because I've had chicken thighs soaking in lemon water and basil for a day or two, and tomorrow I get to use it in the dish I have been concocting in my head for the past week or so. Hopefully I can take some pictures of the completed dish tomorrow too!
     On another note, I watched a video on Yahoo! today that featured chefs using dandelions in food. They had dandelion oil, dandelion cookies and jelly, dandelion calzone, and a lot of other interesting dishes. It made me want to go outside and pick a bunch of the noxious weeds to cook with. Hmm...maybe someday. I love to watch all those cooking shows because it helps to feed my idea bank. Anyway, for anyone who wants to see the famous yellow "flower" actual become useful, here is the link: http://screen.yahoo.com/the-great-dandelion-cook-off-29598394.html?pb_list=809f7f41-46e5-4104-9eba-e0702551faaf

Cheers,

LP

Tuesday, June 12, 2012

How It All Started For Me

     I have always enjoyed cooking. As a teenager, I cooked dinner for the family a lot; not because I had to, but because I enjoyed looking up recipes and trying them out. My family became my unofficial guinea pigs when it came to my creations. When I left home to go to college, things changed a little. Not only was I on a budget, which limited what I could cook, I had to start planning around classes and such. I ended up on the typical "college kid menu," which consisted of prepackaged foods that were easy to make.

     Around the time I met my husband, I started to really cook again. I discovered that cooking is like any other talent-if you don't use it, you lose it. All those months of a college kid diet had completely slashed my creative thinking when it came to food.

     It took a few months after we were married for that creative thought to reappear in my mind. When it did, I started to do something I had never done before: I started creating my own recipes. Up until now, I have never recorded these recipes anywhere but in my memory. This blog is so I have that record and can share what I make with others.

     Recording the recipes may turn out to be a bigger job than I can do. You see, I don't use measurements when I cook from my own recipes. My husband says I have a "Remmy-like" ability. For those who don't understand that reference, Remmy is the Rat from Rattatouille. But I digress. When I cook, I decide what spices should be used based on smells. I discovered that if the spices smell good together when they are just in their jars, they will go well together in the food. I also have to take into consideration what it is I am cooking. For instance, I wouldn't use Seasoned Salt and Lemon Pepper in Chicken Noodle Soup. The two aforementioned spices go very well together, but they don't go very well in Chicken Soup. This I know from experience.

    With that said, I will make every effort to accurately record the measurements I use, and to not just "dump and chuck." Instead of being Amelia Bedelia, (who mixes "a little of this and a little of that")  I will try to be as the chef on Yahoo's Chow Ciao (I think his name is Fabio).

Cheers,

LP